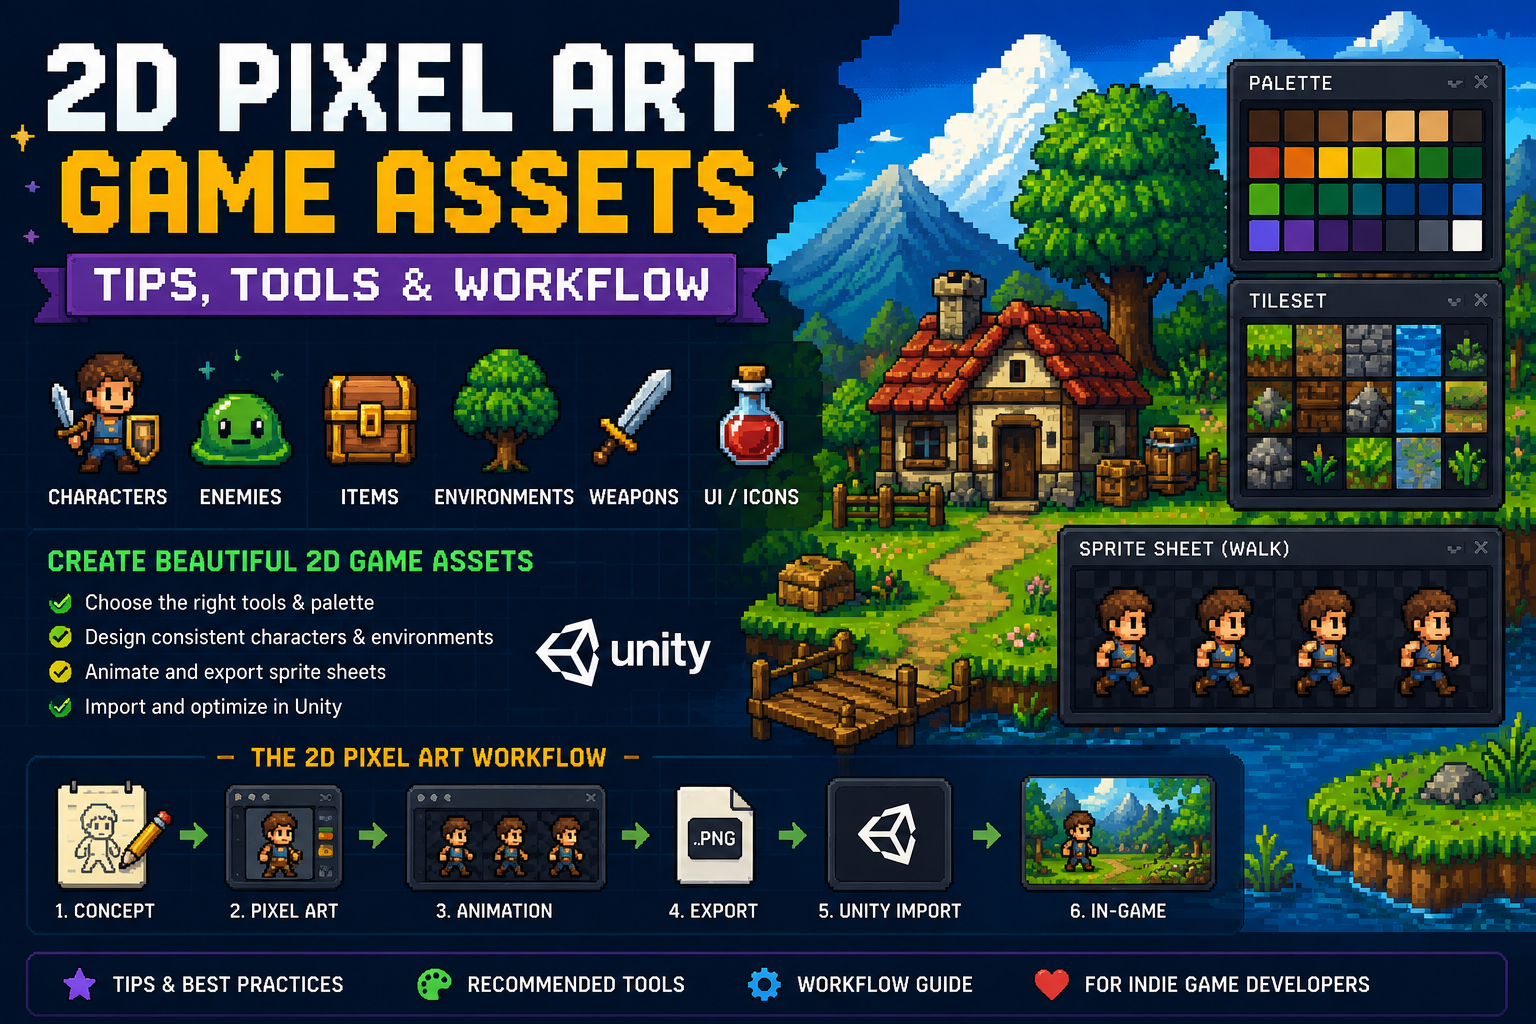
Pixel art remains one of the most popular visual styles for indie games. From characters and enemies to environments, weapons, UI elements, and animations, carefully designed pixel art can give a game a distinctive identity without requiring expensive 3D production.
But good pixel art isn’t simply about drawing small images. A consistent resolution, palette, scale, animation style, and asset workflow are essential if you want your game to look polished.
In this guide, we’ll look at how to create 2D pixel art assets and integrate them efficiently into a Unity game.
What Is Pixel Art?
Pixel art is a digital art style where images are intentionally created using individual pixels as the primary visual elements.
Unlike traditional digital painting, pixel art usually emphasizes:
- Limited color palettes
- Hard edges
- Deliberate pixel placement
- Low-resolution artwork
- Strong silhouettes
- Consistent sprite dimensions
Popular games such as Stardew Valley, Celeste, Dead Cells, and Terraria demonstrate how effective pixel art can be when the art direction is consistent.
1. Choose Your Pixel Resolution
Before creating assets, decide how large your pixels should appear in the final game.
For example:
| Style | Typical Sprite Size |
|---|---|
| Very small retro | 16×16 |
| Classic pixel art | 32×32 |
| Detailed pixel art | 64×64 |
| High-detail pixel art | 128×128+ |
For an indie Unity game, 32×32 or 64×64 is often a good starting point.
The important thing isn’t the exact resolution. Consistency is.
If your character uses 32×32 sprites while environmental objects are created at 128×128 with a completely different pixel density, the game can look inconsistent.
2. Start With Silhouettes
One of the most important pixel-art principles is creating a recognizable silhouette.
Before adding details, make sure you can recognize:
- The player
- Enemies
- Weapons
- NPCs
- Interactive objects
even when they’re displayed as a solid shape.
For example, a character holding a sword should have a silhouette that clearly separates the sword from the body.
This is especially important for games with small sprites.
3. Use a Limited Color Palette
Don’t use dozens of colors simply because they’re available.
A carefully selected palette creates a much stronger visual identity.
A basic character might use:
- 1 outline color
- 2–3 skin/base colors
- 2 shadow colors
- 1–2 highlight colors
- 1 accent color
You can then reuse the same palette across characters and environments.
Why this matters
A consistent palette makes assets from different sources feel like they belong to the same game.
It also makes your art direction easier to maintain as your project grows.
4. Recommended Pixel Art Tools
Aseprite
Aseprite is one of the most popular tools for creating pixel art.
Useful features include:
- Pixel-perfect drawing
- Sprite animation
- Onion skinning
- Tilemap support
- Palette management
- Sprite sheets
- Layer support
It’s particularly useful for game developers because animation and sprite-sheet workflows are built into the application.
Krita
Krita is another excellent option, especially if you want a free/open-source painting application with pixel-art capabilities.
GIMP
GIMP can also be used for pixel-art editing and image processing.
For a dedicated game-development workflow, however, Aseprite is generally more convenient.
5. Create a Consistent Asset Workflow
A good pixel-art workflow can look like this:
Concept → Sketch → Pixel Art → Palette → Animation → Sprite Sheet → Unity
Step 1 — Concept
Define what you’re creating.
For example:
Player character — 32×32 — top-down RPG — 4-direction movement.
Step 2 — Sketch
Create a rough silhouette before worrying about individual pixels.
Step 3 — Pixel Art
Convert the concept into your chosen pixel resolution.
Step 4 — Palette
Apply your game’s established color palette.
Step 5 — Animation
Create the required animation frames.
For example:
- Idle
- Walk
- Attack
- Hurt
- Death
Step 6 — Sprite Sheet
Export the animation frames as a sprite sheet or individual sprites.
Step 7 — Unity
Import the assets and configure the texture settings.
6. Pixel Art Animation
Animation is where pixel art can become significantly more time-consuming.
You don’t always need dozens of frames.
A simple walking animation could use:
4 frames
- Contact
- Passing
- Contact
- Passing
For a small indie game, even 4–8 frames per animation can produce convincing results.
Focus on movement rather than adding unnecessary frames.
7. Create Reusable Tilesets
If you’re building a 2D game, don’t create every environment as a unique image.
Instead, create reusable tiles.
For example, a grass tileset could contain:
- Grass
- Dirt
- Stone
- Water
- Cliff
- Corners
- Edges
- Transition tiles
These can then be combined to build much larger environments.
This approach dramatically reduces your art workload.
8. Use Tilemaps in Unity
Unity’s Tilemap system is particularly useful for pixel-art games.
You can create:
Tileset → Tile Palette → Tilemap → Level
This allows you to build large environments from relatively small collections of sprites.
For example, a 20×20 tileset can potentially create hundreds of different level layouts.
9. Configure Pixel Art Correctly in Unity
This is one of the most important steps.
When importing pixel art into Unity, select the texture and use settings such as:
Texture Type
Sprite (2D and UI)
Filter Mode
Point (no filter)
Compression
None
Wrap Mode
Clamp
The most important setting is usually:
Filter Mode → Point
Without point filtering, Unity can blur the pixels when sprites are scaled.
Instead of:
██ ██ ██
you may end up with blurry edges between pixels.
Point filtering preserves the sharp pixel-art appearance.
10. Use Pixel Perfect Camera
For pixel-art games, consider using Unity’s 2D Pixel Perfect workflow.
A pixel-perfect setup helps ensure that sprites remain aligned to the intended pixel grid.
This becomes especially important when:
- The camera moves
- The player moves smoothly
- Sprites are scaled
- The game supports different resolutions
Without pixel-perfect handling, you may see sprites appearing to shimmer or become slightly blurry during movement.
11. Organize Your Art Assets
A clean folder structure makes your project much easier to maintain.
For example:
Assets/
└── Art/
    └── PixelArt/
        ├── Characters/
        │   ├── Player/
        │   └── Enemies/
        ├── Environment/
        │   ├── Forest/
        │   ├── Village/
        │   └── Dungeon/
        ├── Items/
        ├── Weapons/
        ├── VFX/
        ├── UI/
        └── Tilesets/
You can also separate source files:
ArtSource/
    Aseprite/
from exported game assets:
Unity/
    Sprites/
12. Don’t Mix Pixel Densities
This is a common mistake.
Imagine your game contains:
- 32×32 character
- 16×16 tree
- 128×128 weapon
- 256×256 environment texture
Even if each asset looks good individually, they may look strange together.
Define a pixels-per-unit strategy early.
For example:
16 pixels = 1 Unity unit
Then maintain that scale across your project.
13. Create a Pixel Art Style Guide
If you’re building a larger game, create a small style guide.
Document:
Resolution
32×32 characters
Pixel density
16 pixels per Unity unit
Outline
Dark blue/black outline
Palette
Limited 12–24 color palette
Lighting
Top-left light source
Shadows
Hard-edged shadows
Animation
4–8 frames per basic animation
This becomes extremely useful when creating dozens or hundreds of assets.
14. AI Can Help With the Workflow
AI tools can be useful during the concept and reference stages of pixel-art production.
For example, AI can help generate:
- Character concepts
- Environment ideas
- Color palette suggestions
- Enemy designs
- Weapon concepts
- Background references
However, generated images often need significant cleanup before they can be used as production-ready pixel art.
A good workflow is:
AI Concept → Human Art Direction → Pixel Conversion → Cleanup → Animation → Unity
The goal isn’t to replace the artist. It’s to speed up ideation and iteration.
15. Build an Asset Pipeline
As your project grows, manual asset management becomes increasingly difficult.
Consider establishing naming conventions such as:
Player_Idle_01
Player_Idle_02
Player_Walk_01
Player_Walk_02

Goblin_Idle_01
Goblin_Attack_01

Sword_Iron
Sword_Fire
Sword_Poison
This makes it easier to locate and automate assets.
For larger Unity projects, you can also use:
- Sprite Atlases
- Addressables
- AssetBundles
- Automated import settings
- Custom editor tools
Common Pixel Art Mistakes
❌ Using too many colors
Keep the palette controlled.
❌ Anti-aliasing
Pixel art generally needs hard edges.
❌ Blurry sprites
Use point filtering and appropriate pixel-perfect settings.
❌ Inconsistent proportions
Define a consistent character scale.
❌ Random lighting
Keep your light direction consistent.
❌ Mixing pixel densities
Choose a standard and stick to it.
❌ Over-detailing
At small resolutions, readability is more important than detail.
Recommended Pixel Art Workflow for Unity Developers
If you’re starting a new 2D game, I’d recommend:
1. Define art style
        ↓
2. Choose resolution
        ↓
3. Define pixel density
        ↓
4. Create palette
        ↓
5. Create character
        ↓
6. Create environment tiles
        ↓
7. Create animations
        ↓
8. Export sprite sheets
        ↓
9. Import into Unity
        ↓
10. Configure Point filtering
        ↓
11. Configure Pixel Perfect
        ↓
12. Build levels with Tilemaps
This approach gives you a much more consistent art pipeline.
Final Thoughts
Creating pixel art for a game isn’t just about making small images. The strongest results come from having a consistent visual system.
Choose your resolution, pixel density, palette, proportions, lighting style, and animation approach before producing a large number of assets.
For Unity developers, a workflow built around Aseprite + sprite sheets + Tilemaps + Pixel Perfect + organized asset management provides a strong foundation for building polished 2D games.
Once the foundation is established, adding new characters, enemies, environments, weapons, and animations becomes much faster.
🎮 Explore My Game Development Work
Want to see the practical side of game development?
Check out my playable resume to explore my Unity experience, projects, technical skills, and interactive experiments.
👉 Explore My Playable Resume →
You can also add it as a reusable CTA at the end of your other GameDeveloper articles so readers have a clear path from your tutorials to your portfolio.