
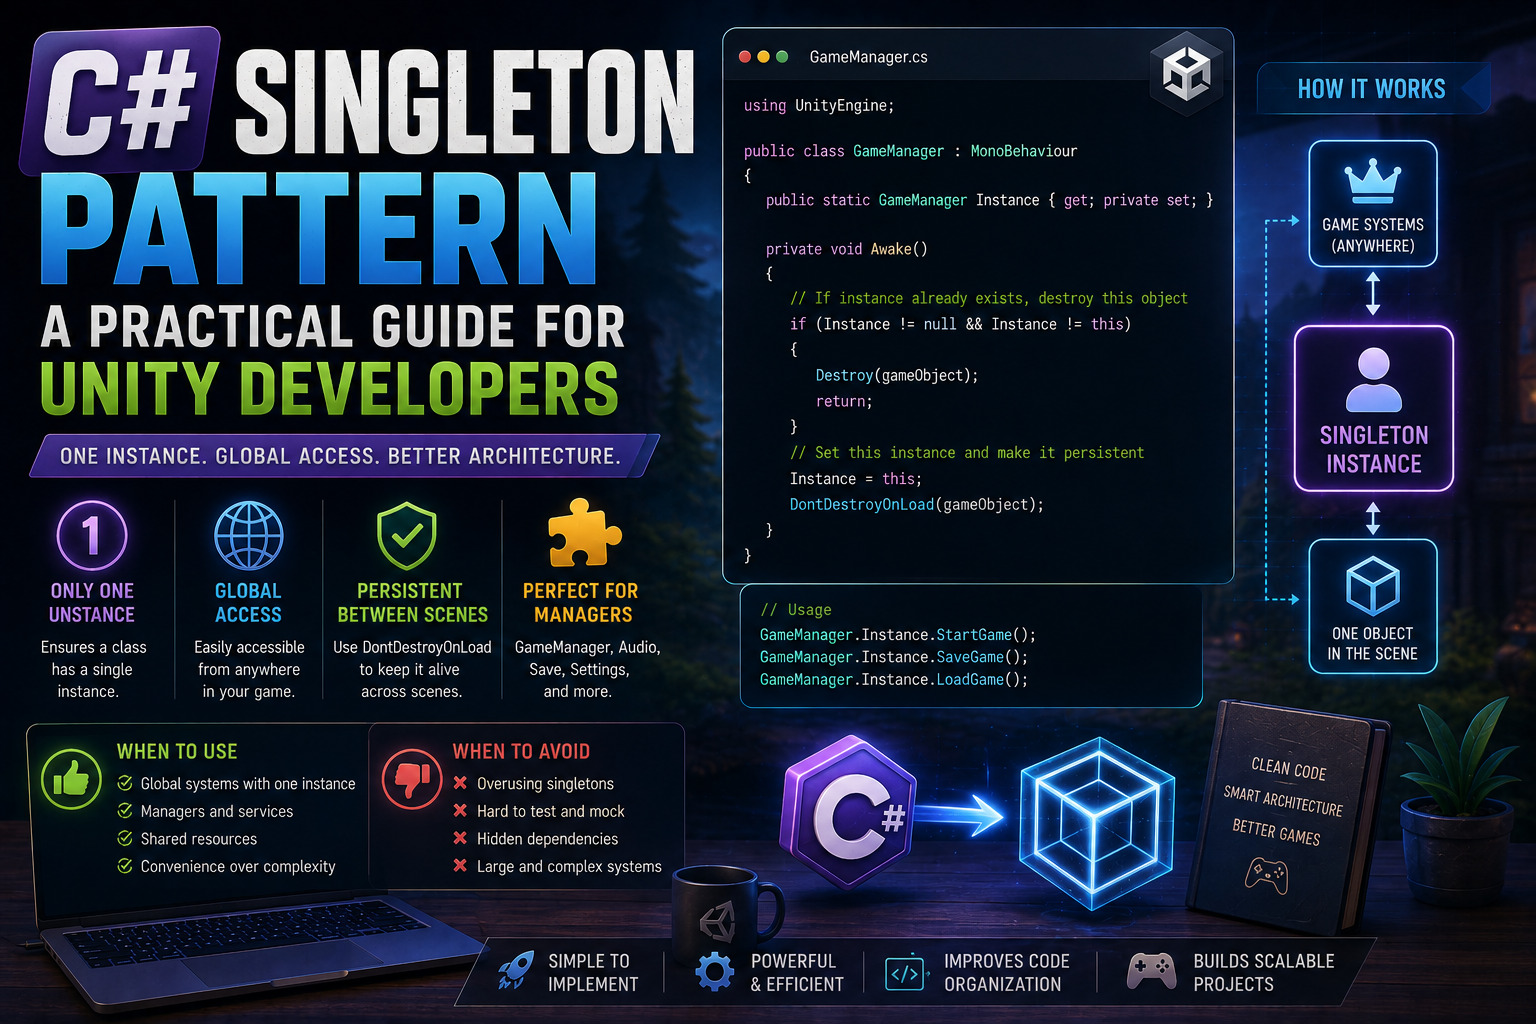
The Singleton Pattern is one of the most commonly used design patterns in Unity. It provides a simple way to ensure that a class has only one instance while allowing other scripts to access that instance from anywhere in the game.
For systems such as audio management, save data, settings, and global game state, a Singleton can be extremely convenient. However, using Singleton for every manager can create tightly coupled code and make larger projects harder to maintain.
In this guide, we’ll understand how the Singleton pattern works in C#, how to implement it in Unity, and when you should—and shouldn’t—use it.
What Is the Singleton Pattern?
A Singleton restricts a class to one instance and provides a global access point to that instance.
Think of it like this:
                 Game Systems
                      │
          ┌───────────┴───────────┐
          │                       │
       Player                   Enemy
          │                       │
          └───────────┬───────────┘
                      ↓
              GameManager.Instance
                      │
              ONE GameManager
Instead of creating multiple GameManager objects, every system accesses the same instance.
For example:
GameManager.Instance.StartGame();The important characteristics are:
- One instance
- Global access
- Controlled creation
- Shared state
Why Use Singleton?
Imagine your game has an AudioManager.
You don’t normally want every scene or every player to create another audio manager.
Instead:
AudioManager.Instance.PlaySound(attackSound);The same AudioManager can be used by:
- Player
- Enemies
- UI
- Main Menu
- Cutscenes
- Boss systems
This makes Singleton particularly attractive for global systems.
A Basic C# Singleton
A traditional C# Singleton can be implemented like this:
public class GameManager
{
    private static GameManager instance;

    public static GameManager Instance
    {
        get
        {
            if (instance == null)
            {
                instance = new GameManager();
            }

            return instance;
        }
    }

    private GameManager()
    {
    }
}
Now you can access it with:
GameManager.InstanceFor example:
GameManager.Instance.StartGame();The private constructor prevents other classes from directly creating another instance.
Singleton in Unity
Unity is slightly different because most game systems are implemented as MonoBehaviour components.
A common Unity implementation is:
using UnityEngine;

public class GameManager : MonoBehaviour
{
    public static GameManager Instance { get; private set; }

    private void Awake()
    {
        if (Instance != null && Instance != this)
        {
            Destroy(gameObject);
            return;
        }

        Instance = this;

        DontDestroyOnLoad(gameObject);
    }
}
Now other scripts can access:
GameManager.InstanceHow Does It Work?
Let’s break the implementation down.
Step 1: Create a static instance
public static GameManager Instance { get; private set; }static means the property belongs to the class rather than a particular object.
The private set prevents other scripts from replacing the instance:
GameManager.Instance = anotherManager;This isn’t allowed outside the class.
Step 2: Check for duplicates
Inside Awake():
if (Instance != null && Instance != this)
{
    Destroy(gameObject);
    return;
}
If another GameManager already exists, the new one is destroyed.
This prevents:
Scene 1
 └── GameManager

Scene 2
 └── GameManager

       ↓

Duplicate instances
from causing problems.
Step 3: Register the instance
Instance = this;The current GameManager becomes the Singleton instance.
Step 4: Keep it between scenes
DontDestroyOnLoad(gameObject);Normally, Unity destroys scene objects when loading another scene.
DontDestroyOnLoad() keeps the object alive.
For example:
Main Menu
    │
    ↓
GameManager
    │
    │ Scene Change
    ↓
Gameplay
    │
    ↓
GameManager still exists
This is useful for systems that need to survive scene changes.
Example: Audio Manager
Let’s create a simple AudioManager.
using UnityEngine;

public class AudioManager : MonoBehaviour
{
    public static AudioManager Instance { get; private set; }

    [SerializeField]
    private AudioSource audioSource;

    private void Awake()
    {
        if (Instance != null && Instance != this)
        {
            Destroy(gameObject);
            return;
        }

        Instance = this;
        DontDestroyOnLoad(gameObject);
    }

    public void PlaySound(AudioClip clip)
    {
        audioSource.PlayOneShot(clip);
    }
}
Now your Player script can simply call:
AudioManager.Instance.PlaySound(attackSound);You don’t need to find the AudioManager manually.
Where Can You Use Singleton?
Singletons are useful for systems that genuinely have a single global instance.
Common examples include:
GameManager
Controls overall game state.
GameManager.Instance.StartGame();AudioManager
Controls music and sound effects.
AudioManager.Instance.PlaySound(sound);SaveManager
Handles saving and loading.
SaveManager.Instance.SaveGame();SettingsManager
Handles global settings.
SettingsManager.Instance.SetVolume(0.8f);AnalyticsManager
Handles analytics events.
AnalyticsManager.Instance.TrackEvent("LevelCompleted");Generic Singleton
If your project has several Singleton classes, you may find yourself repeating the same code.
A generic base class can help.
using UnityEngine;

public abstract class Singleton<T> : MonoBehaviour
    where T : MonoBehaviour
{
    public static T Instance { get; private set; }

    protected virtual void Awake()
    {
        if (Instance != null && Instance != this)
        {
            Destroy(gameObject);
            return;
        }

        Instance = this as T;

        DontDestroyOnLoad(gameObject);
    }
}
You can now create:
public class AudioManager : Singleton<AudioManager>
{
}
And:
public class SaveManager : Singleton<SaveManager>
{
}
Then:
AudioManager.Instance
SaveManager.Instance
This keeps the Singleton implementation in one place.
Singleton and Scene Management
One of the biggest advantages of a Unity Singleton is persistent state.
Suppose your game contains:
Boot
 ↓
Main Menu
 ↓
Level 1
 ↓
Level 2
 ↓
Level 3
Your SaveManager can remain alive throughout the entire game:
             SaveManager
                 │
       ┌─────────┼─────────┐
       ↓         ↓         ↓
    Menu       Level 1   Level 2
This is especially useful for:
- Player progress
- Settings
- Audio
- Game configuration
- Session state
The Problem With Singletons
Singletons are convenient, but they aren’t a solution for every problem.
A common mistake is turning every manager into a Singleton:
GameManager.Instance
AudioManager.Instance
UIManager.Instance
PlayerManager.Instance
EnemyManager.Instance
InventoryManager.Instance
QuestManager.Instance
SaveManager.Instance
NetworkManager.Instance
At this point, almost every system depends on global state.
That can make your architecture difficult to understand.
Hidden Dependencies
Consider this class:
public class Enemy
{
    public void Die()
    {
        GameManager.Instance.AddScore(100);

        AudioManager.Instance.PlaySound(deathSound);

        UIManager.Instance.UpdateScore();

        SaveManager.Instance.SaveGame();
    }
}
The Enemy class now depends on four global systems.
Someone reading the class has to understand all those dependencies.
This is one of the biggest disadvantages of excessive Singleton usage.
Singleton vs Dependency Injection
For larger projects, Dependency Injection can provide a cleaner architecture.
Instead of:
AudioManager.Instance.PlaySound(sound);a class can receive the service it needs:
public class Player
{
    private readonly IAudioService audioService;

    public Player(IAudioService audioService)
    {
        this.audioService = audioService;
    }
}
Now the Player doesn’t need to know how the audio system is created.
This makes systems easier to:
- Test
- Replace
- Reuse
- Refactor
Singletons are convenient; Dependency Injection generally provides more explicit dependencies.
Singleton vs Static Class
Singletons and static classes are not the same.
A static class:
public static class MathUtility
{
    public static int ClampHealth(int value)
    {
        return Mathf.Clamp(value, 0, 100);
    }
}
is accessed directly:
MathUtility.ClampHealth(150);There is no object instance.
A Singleton has an actual object:
GameManager.InstanceThis means a Singleton can:
- Store state
- Be a
MonoBehaviour - Implement interfaces
- Participate in Unity’s lifecycle
- Hold references to other components
A useful rule is:
Use static classes for stateless utility functionality and Singleton-like services when you genuinely need one shared object.
Common Singleton Mistakes
1. Making Everything a Singleton
Just because something is used in multiple places doesn’t mean it needs to be a Singleton.
2. Forgetting Duplicate Protection
Without:
if (Instance != null && Instance != this)
{
    Destroy(gameObject);
    return;
}
you can accidentally create multiple instances.
3. Using DontDestroyOnLoad Everywhere
Not every object should survive scene changes.
Only persistent systems should use:
DontDestroyOnLoad(gameObject);4. Creating Hidden Dependencies
If ten different classes access GameManager.Instance, changing GameManager’s responsibilities can affect a large part of the project.
5. Making Testing Difficult
Global state can make unit testing harder because different tests may share the same Singleton state.
When Should You Use Singleton?
A Singleton is a reasonable choice when:
- There should genuinely be only one instance.
- The system has global scope.
- The object needs to persist across scenes.
- Global access improves the design.
- The project is small or medium-sized.
- The alternative would introduce unnecessary complexity.
Good examples include:
Audio Service
Save Service
Settings Service
Global Configuration
Game Session
When Should You Avoid Singleton?
Consider alternatives when:
- Multiple instances could make sense.
- The object has a limited lifetime.
- The system is highly reusable.
- You need extensive unit testing.
- Dependencies should be explicit.
- Your project is becoming highly interconnected.
For larger games, consider:
- Dependency Injection
- Interfaces
- Events
- Service containers
- Composition
- ScriptableObject-based architecture
A Practical Unity Architecture
For a smaller Unity project, something like this can work well:
Bootstrap
   │
   ├── GameManager
   ├── AudioManager
   ├── SaveManager
   └── SettingsManager
But as the project grows, you may want:
Bootstrap
   │
   └── Services
        │
        ├── Audio Service
        ├── Save Service
        ├── Analytics Service
        └── Configuration Service
                 │
                 ↓
          Gameplay Systems
                 │
        ┌────────┼────────┐
        ↓        ↓        ↓
      Player   Enemy   Inventory
This approach keeps responsibilities more clearly separated.
Final Thoughts
The Singleton pattern is not inherently bad.
The important thing is knowing when to use it.
For a small Unity project, a Singleton can be a clean and practical solution for systems such as AudioManager, SaveManager, SettingsManager, and GameManager.
For larger projects, however, excessive Singleton usage can lead to global state, hidden dependencies, and tightly coupled systems.
The key principle is:
Use Singleton because your system genuinely needs one shared instance—not simply because
Class.Instanceis convenient.
Once you understand Singleton, the next step in your C# journey should be learning interfaces, events, SOLID principles, dependency injection, and other design patterns. These concepts will help you move from simply writing Unity scripts to designing scalable game architecture.